Why Bryce Is a Cheat Code for Beginners
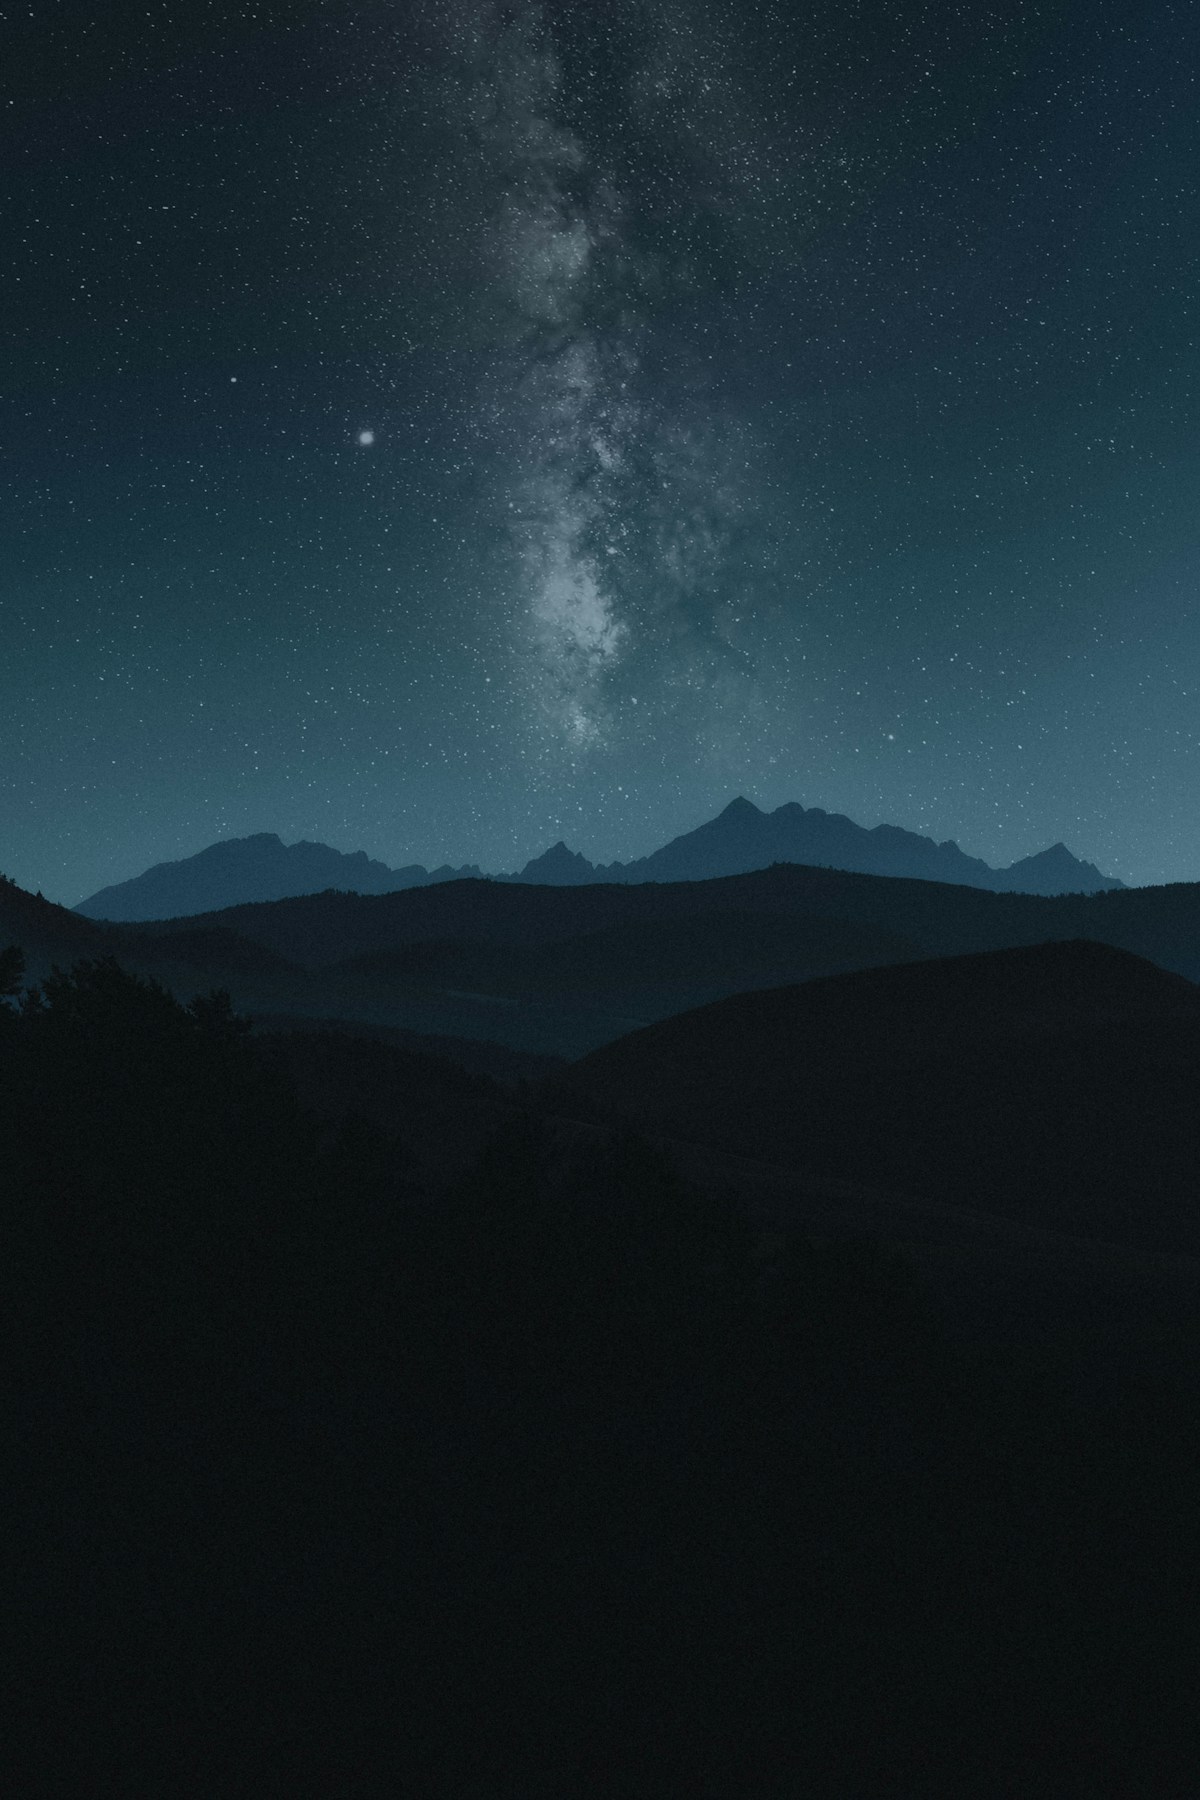
Night photography is hard mostly because of light pollution: at a typical suburban site, the sky glows orange in every frame and the Milky Way barely registers above the noise. Bryce removes that problem. With magnitude 7.4 skies, the signal you're trying to capture is dramatically stronger, which means simpler gear and shorter exposures still produce real results. The same phone shot that shows three stars at home can show the galactic core here.
One thing the dark sky doesn't fix: camera shake. Every night photo is a long exposure, and a long exposure needs a perfectly still camera. That's the entire game. Everything below is variations on "hold still and let the light in."
| Setting | Starting value |
|---|---|
| Aperture | Widest (lowest f-number) |
| ISO | 3200 |
| Shutter speed | 15–20 seconds |
| Focus | Manual, infinity |
| White balance | 4000–4500K (manual) |
| File format | RAW if available |
| Timer / remote | 2-second delay |
Shooting With a Phone
Recent iPhones and Android flagships have genuinely capable night modes, and at Bryce they punch far above their weight.
- Stabilize it — really. Night mode exposures of 10–30 seconds are useless handheld. Use a small tripod with a phone clamp, or brace the phone on a fence rail, rock, or jacket-wrapped ledge. A $25 mini tripod is the single best purchase you can make for this trip.
- Force the long exposure. On iPhone, when the camera detects stillness, the night mode timer extends — tap it and slide to maximum (up to 30 seconds on a tripod). On Pixel phones, look for Astrophotography mode in Night Sight; it engages automatically once the phone has been still a few seconds and takes about four minutes. Samsung users: try Pro mode, 20–30 second shutter, ISO 1600–3200, manual focus to infinity.
- Use the timer or voice shutter. Tapping the screen shakes the phone. A 3-second delay fixes it.
- Turn your screen brightness all the way down and enable any red-tint or night shift mode. Your eyes — and everyone else's at the viewpoint — will thank you.
- Don't zoom. Use the main (1x) lens; it has the biggest sensor and widest aperture. Crop later if you must.
Shooting With a Basic Camera
Any DSLR or mirrorless camera with manual mode — even a ten-year-old entry model — can outshoot a phone if you give it three things: a tripod, the right settings, and focus at infinity.
- Starting settings: widest lens you own, aperture wide open (lowest f-number), ISO 3200, shutter 15–20 seconds. Review, then adjust: brighter sky, drop ISO; dim stars, lengthen exposure slightly.
- The 500 rule: to keep stars as points instead of streaks, keep your shutter under 500 divided by your focal length (full frame). With an 18mm lens on a crop sensor, that's roughly 18 seconds. When in doubt, stay at 15.
- Focus is the #1 killer. Autofocus is useless in the dark. Switch to manual, use live view, magnify a bright star, and turn the ring until it's the smallest point possible. Do this once and tape the ring.
- Shoot RAW if your camera offers it. Night shots benefit enormously from even basic editing afterward.
- Use the 2-second self-timer (or a remote) so pressing the shutter doesn't shake the frame.
Cold kills batteries. The rim is above 8,000 feet and drops into the 40s on summer nights, far lower the rest of the year. Carry a spare battery in an inside pocket, and expect your phone to drain fast. Hand warmers double as lens-fog prevention if you rubber-band one near (not on) the front of the lens.
Timing and Composition
The two decisions that matter more than any setting:
- Moon phase. Shoot within about five days of the new moon for the Milky Way. A bright moon erases the core — though a moonlit-hoodoo shot is a legitimate consolation prize and far easier to expose.
- Foreground. A sky-only photo could have been taken anywhere. What makes a Bryce night photo is hoodoos silhouetted against the stars. The amphitheater rim gives you that for free: in summer, the galactic core stands over the amphitheater from the main viewpoints. Our viewpoints at night guide covers which overlooks face the core and how to navigate them safely in the dark — read it before you go, because shuffling around an unfamiliar rim at midnight with a tripod is how accidents happen.
Arrive in twilight, set up while you can still see, frame your composition on the dimming horizon, and then wait for full dark. The window from about 90 minutes after sunset until moonrise is your working time.
Want a Guide Standing Next to You?
Bryce Canyon Stargazing's guided night tours are a shortcut for photographers: guides know where the core will be, when moonrise hits, and how to get your camera or phone dialed in while you actually enjoy the sky.
Reserve with Bryce Canyon StargazingA Simple Shot List for One Night
- Blue hour rim shot — hoodoos in deep twilight with the first stars. Easy exposure, always works.
- Milky Way over the amphitheater — the keeper. 15–20 seconds, high ISO, core over the hoodoos.
- People under the stars — have your group stand still for the full exposure, silhouetted on the rim. The most shared photo of any trip.
- Star trails (bonus) — point north at Polaris, take 50+ consecutive 30-second frames, stack them later with free software. Set it running and just watch the sky.
Where to Go Deeper
This page deliberately stops at the beginner line. If the bug bites — and at Bryce it tends to — the next steps are tracking mounts, image stacking, and dedicated astro lenses, all topics with deep communities and tutorials behind them. Before you invest in any of that, spend one night here with the gear you already own. Check the FAQ for moon-phase and weather planning, and if your trip lines up with June, the Astronomy Festival usually includes photography-focused sessions where you can learn from people who shoot this sky all year.